Have you come across WSAPPX Process in the Task Manager?? If not, let us know what actually WSAPPX is and all about it. It is said that the process belongs to the windows store application and is also called as WSService.
As per many users, the process is known to consume lots of CPU resources. Almost 40 of the CPU resources are said to be consumed which includes almost three services of the windows and they are,
Windows Store service (WSS service), Appx Deployment service (appxSVC) and the final one is Client license service (Clip SVC). All these services give the infrastructure support for all the windows store services as well as the applications.
Any of these services should not be disabled as disabling those makes the windows store to not function in a proper way.
Don’t Miss – Watch movies free online Sites 2019

wsappx
The svchost.exe wsappx is an important service in the process of Windows which is responsible for and is responsible for the windows store program and high CPU or high disk usage by the windows PCs.
This problem of consuming high CPU by the WSAPPX is mainly seen in the Windows 10 computers. The users have reported this issue occurs when they start downloading any app from the app store or when updating the files. One can’t disable the service using the task manager startup or control panel dashboard to fix this issue.
So, how can we fix this issue?? If this is your question, there are few solutions for that. Let us resolve the issue of high CPU usage by the WSAPPX process and boost the speed of the computer. Just by right-clicking on the process and tapping on the end task can’t solve the issue and the windows will send an error message that the service can’t be stopped or sometimes it is killed but is a temporary solution and it can pop-up again. So, we need to do it manually.
Solutions to Fix WSAPPX High CPU Usage Error
For this, one should make the windows store disable from the Local Group Policy editor and the process will disappear with it. But, we can’t guarantee it that it won’t appear again. Just, we need to give it a try and fix the error.
Along with this, there are few more solutions that we have given here to fix the issue. We advise the users to go through the list of solutions given here and fix the error from not occurring again.
-
Scan for Malware or Virus
Before troubleshooting the problems related to the high CPU usage by WSAPPX, one needs to scan their PC for malware or virus which would cause your system’s memory or hard disk, CPU for working at the high level to consume their resources.
Use any of the antivirus programs installed on your PC for scanning for the virus and malware causing the issue and remove them. If you don’t have one such program installed on your PC, download one to scan and remove the malware.

-
Disable Windows Store Service in Windows 8 / 8.1 and in Windows 10
Windows Store (WSService) is important for all that apps that are downloaded from the windows store. So, one can only disable it if you are not using any apps from the windows store. Note that,
Windows Store application can’t be disabled in Windows 10 and Windows 10 Pro either from the control panel or windows services as said above. But if you want to disable it necessarily, then you need to turn it off using the Local Group Policy Editor.
Disabling the Windows Store Application can be done in Windows 8 and Windows 8.1 directly with the help of below-given steps. Users can see the procedures for turning off the Windows Store app in Windows 8 / 8.1 and in Windows 10 given below and follow the same for the windows versions you are using.
Turn Off Windows Store in Windows 8 / 8.1
- Click Windows Key along with R simultaneously for opening the Run command dialog box.
- Type “regedit” in the box and click Enter from the keyboard.

- Now, take the backup of the registry and do the following.
- From the main menu of the “Registry Editor”, go to the “File” and select “Export”.

- Give the destination location and specify the file name to the exported registry file. Choose from “Export range: All” and click on “Save”.
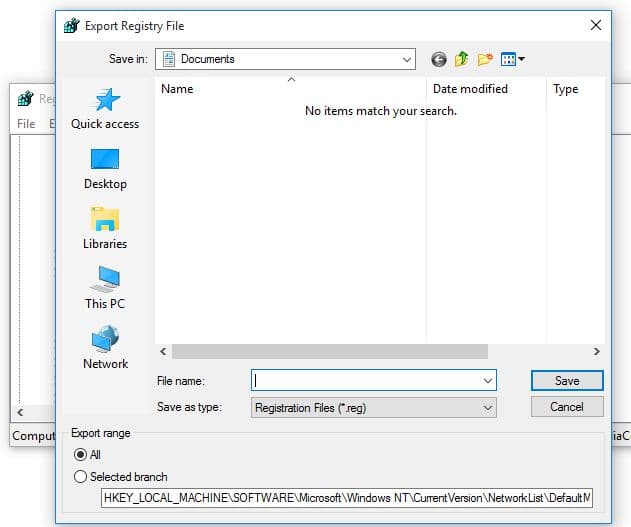
- Once you backup your registry, go to the location as given below at the left pane of the registry editor.
- HKEY_LOCAL_MACHINESOFTWAREPoliciesMicrosoftWindowsStore
Note: If the Windows Store Key is not present there, then right-click on the “Microsoft key” and then choose New followed by Key and give it a name “WindowsStore” without quotations.

- At the right pane of the editor, right click on the empty space and select “New” followed by “DWORD Value” as shown in below image.
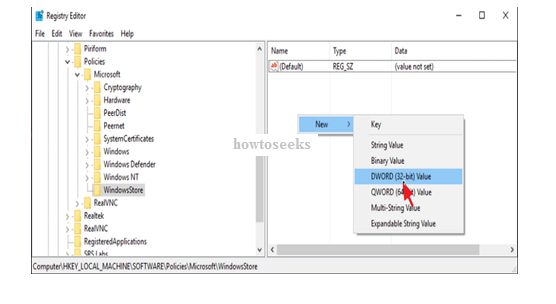
- At the new value, give the name as “RemoveWindowsStore”.
- Now double-click on the newly created value “RemoveWindowsStore” and type “1” without quotes in the value data box as shown below.
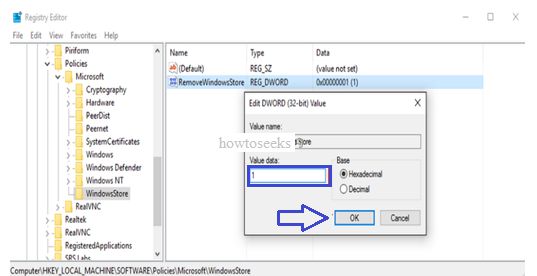
- Close the registry editor finally and restart the PC to fix the error. With this, the Windows Store is disabled on your Windows 8 / 8.1 PC and whenever you try to open the store, you will get a message called “Windows Store isn’t available on this PC. Contact your system administrator for more information.”

Turn Off Windows Store in Windows 10 PC
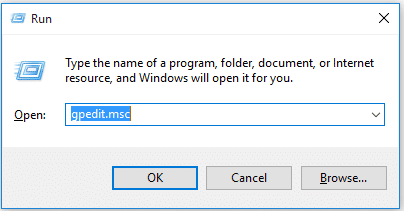
- Press Windows Key along with R and Run box will open.
- Type “gpedit.MSC” without quotations in the run box and hit Enter.
- Now the Local Group Policy Editor will open in which you need to go to the location Computer Configuration > Administrative Templates > Windows Components > Store.
- Locate the option “Turn off the Store application” and double click on it and select “Enabled”.
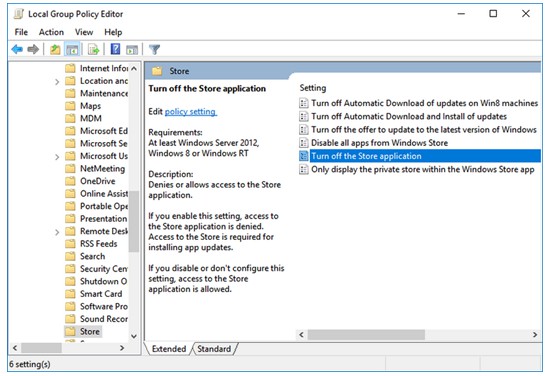
- Tap on the button “Apply” and then click on “OK”.
- Finally, restart the computer.
Even after doing this, if you see WSAPPX is running still in the task manager when the windows store is off, you don’t have to worry about it as the CPU resources will not be compromised anymore by this process.
There are also other solutions to fix the error and they are as follows. If this method does not work, do the next solutions.
-
Disable Windows Search and Superfetch Services
Superfecth Service will cash the data to RAM from an open application, so you close and re-open any app, the app will be loaded quickly and the perfect service improves the performance of the system in this way. But, many times users have reported that this service is using high CPU or hard disk. So you need to disable the service for reducing the high CPU usage.
- Click Windows button + R at the same time and Run box will be opened.
- In the run box, type “services.msc” and click “Enter”.

- Right tap on the “Superfetch” service in the services window and choose “Properties”.
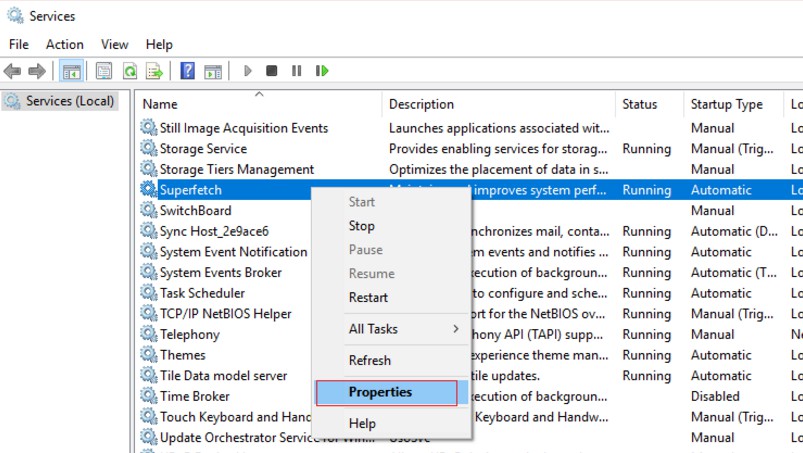
- Now in another window that appears, set the “Startup type” to be “Disabled”.
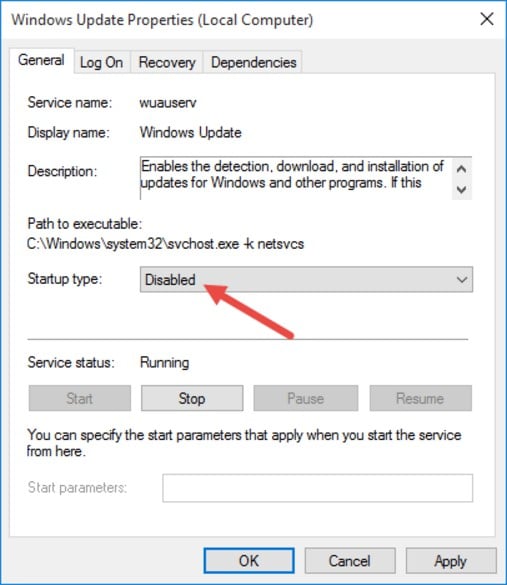
- Close the Superfetch properties window by clicking on “OK”.
- Finally, reboot the computer and if the high CPU usage still persists, do the same process but, this time you need to “Disable” windows search service.
-
Increase Virtual Memory (Paging File)
- Right click on “Computer icon (Name)” and choose “Properties”.
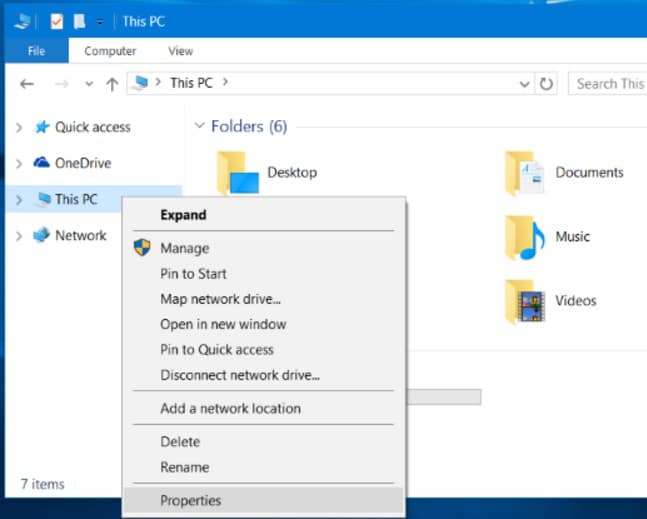
- Tap on “Change Settings” from the right pane of the window.
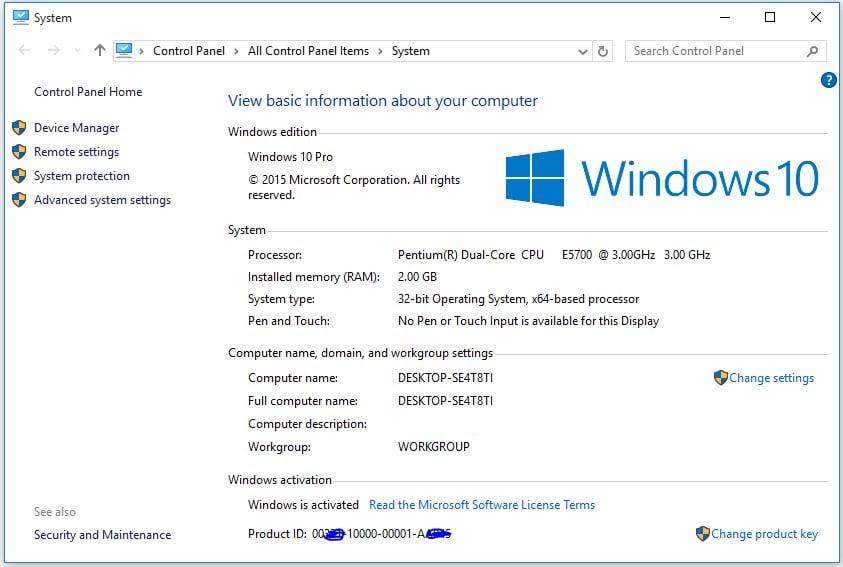
- In the system properties window, at the under the “Advanced” tab, choose “Settings” under the “System Performance”.

- Now under the “Performance Options”, tap on the tab “Advanced” and choose “Change” at the section “Virtual Memory”.
- Now, uncheck the checkbox beside “Automatically manage paging file size for all drives” and select the radio button “Custom Size”.

- Set both the initial size and maximum values to twice and the half (2,5) of the RAM size and it should be in MB and then click on the “Set” button.
- Click on “OK” three times for exiting.

- Restart the PC and check if the problem is solved. If not, try next to fix.
-
Run System Maintenance
For automatically fixing the issues of the system, run the troubleshooter called system maintenance. Do it in the following method.
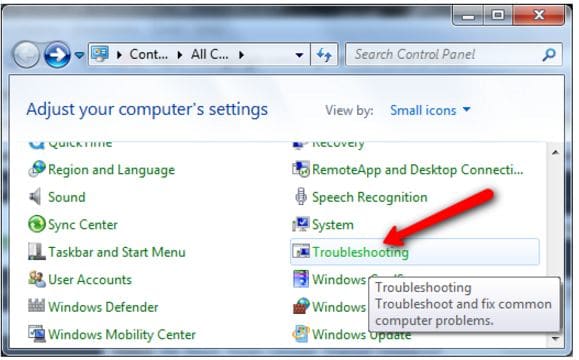
- Select “Control Panel” by right clicking on Windows Start button.
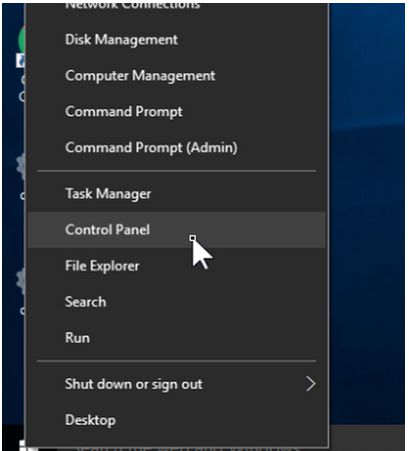
- At the right corner of the control panel, set View by to “Small icons”.
![]()
- From the list of options, locate and open “Troubleshooting” as shown below.
- Tap on “View all” from the left pane of troubleshooting window.
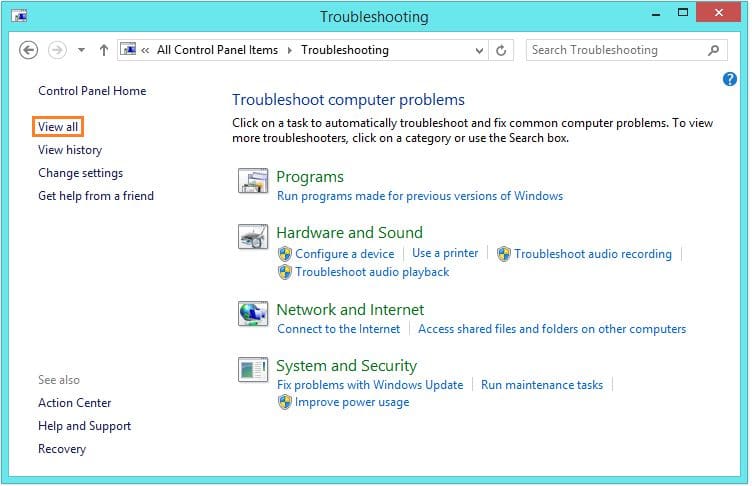
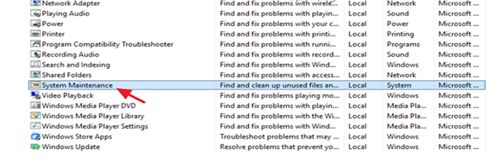
- Now you need to double click on the option “System Maintenance”.
- Click on “Next” and follow onscreen instructions or prompts for running the System Maintenance troubleshooter.
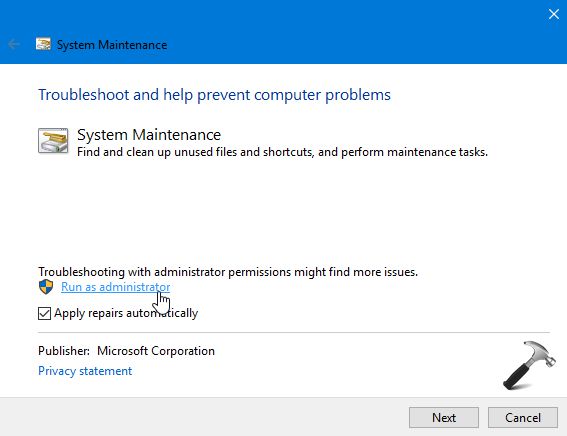
Probably, doing this would fix the error. The other solutions that can help in resolving the error WSAPPX that uses the high CPU or disk resources are, rebuilding the index or disabling the defrag task.
Conclusion
Sometimes uninstalling the antivirus program of the PC can also work to solve the issue of high CPU usage. Any of these solutions given here have worked out for some of the users who reported about the issue.
So, users who are having this issue can try any of these solutions based on the actual cause of the problem and get the error fixed in few steps. This is all about the WSAPPX error, why it is using high CPU and how to fix that error. Hope, this guide helps you.
driver_irql_not_less_or_equal windows 10
Service Host Local System High Disk