
In the recent times, there were reports from the users that the service host local system high disk or same like this service host local system (network restricted) without any proper reason. After share on watch new movies online free now we are talking about Can I stop service host local system? concept.
You know that They say that the problem is rising up in the middle of the regular work or when the PC wakes up from the sleep. If you are the one facing the same issue, then you can know about the possible reasons causing the issue and the solutions from here.
Some of the possible reasons can be as follows. Once you explore the Task Manager, you will be able to see that the Windows Service Host Local Service is causing this issue of high CPU usage. This not related to the power or speed of the CPU.
But, Service Host Local Service will have lots of sub-services and some of the sub-services would cause usage of CPU in the maximum level. Let us know what is service host local system also svchost.exe service host: local system completely.
Contents
5 Fixes for Service Host Local System High CPU (network restricted) or High Disk Usage
The service is said to be Superfetch and it is used for preloading of the data in to the RAM memory from the hard disk. These problems are especially seen with the Windows 10 user and it is also observed that numerous amount of CPU or the disk space is consumed i.e., 95 of the total space.
In order to avoid the high CPU consumption, there are possible solutions to fix the issue and some of the common solutions used by the people are listed below about service host local system high CPU or service host local system high memory guide.
-
Disable Superfetch Service
In order to improve the performance and to reduce the usage of high disk or CPU, one needs to disable the Superfetch Service and you can do it in the following way.
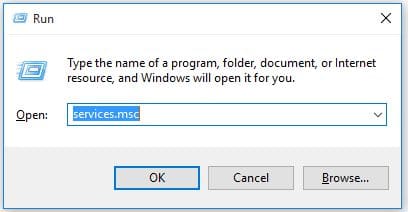
- Press the buttons Windows + R from your keyboard.
- Now, the Run box will appear on the screen.
- In the run box, type “services.msc” without quotes and click “OK” button.
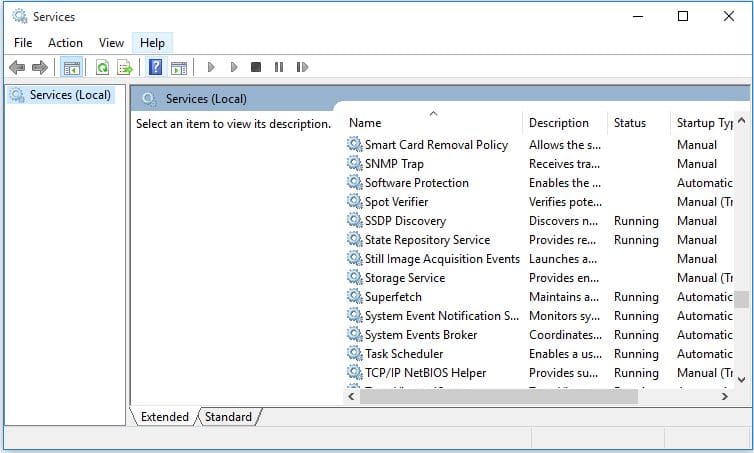
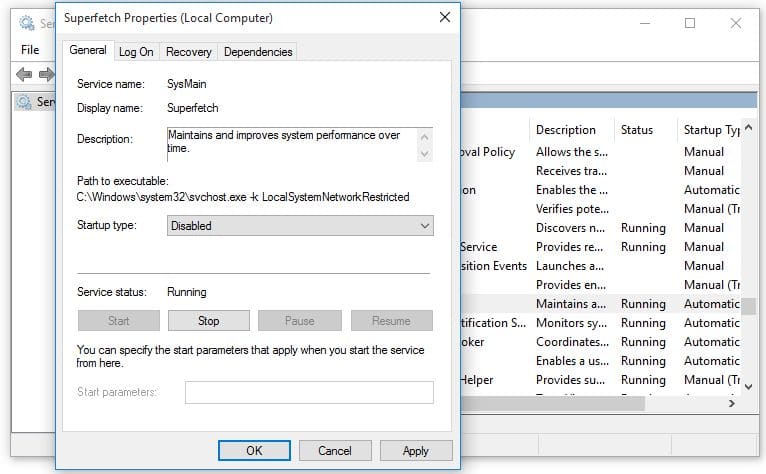
- Now a window will appear on screen with the list of services on your CPU. Scroll down to the list and find the service that is named as the “Superfetch”.
- In order to edit the settings of the Superfetch, you need to double-click it for opening its properties.
- Next you need to tap on “Stop” for stopping the service superfetch service.
- You need to set the Start type for the Superfetch to be Disabled.
- Tap on “Apply” and then click on “OK”.
- Next, restart your computer and see that the changes are effected on the issue or not ones the system reboots. If the Superfetch is not the root cause of the issue, then you can go the next solution.
Though Microsoft says that, the Superfetch service will actually improve the performance of the computer overtimes, when it comes to practice it is opposite actually. Many users have reported that this Service will keep the performance of the optimized when the computer is installed newly but after some time,
The performance will be decreased in fact. Also, it should be noted that this service host superfetch service will run on the low priority and so it should not affect the other activities such as IO activities and this is because the IO activities will normally run on the high priority. Ok now go ahead for service host local system 100 disk.
-
Fixing Memory Leak in Non-Paged Pool of Memory
If the above solution does not work, there is another solution that you can try to fix the problem i.e., fix the memory leak of the non paged pool which can be done in the following way.
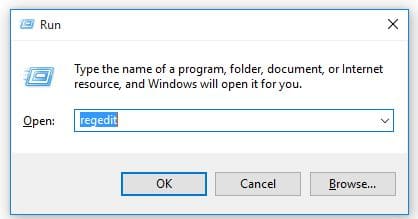
- Click Windows button along with R button from the keyboard.
- Now the Run box will open.
- Type “regedit” in the run box without quotations and hit the Enter button as shown in below image.
- The Registry editor will open now in which you have to go to the following in the left pane of the editor.
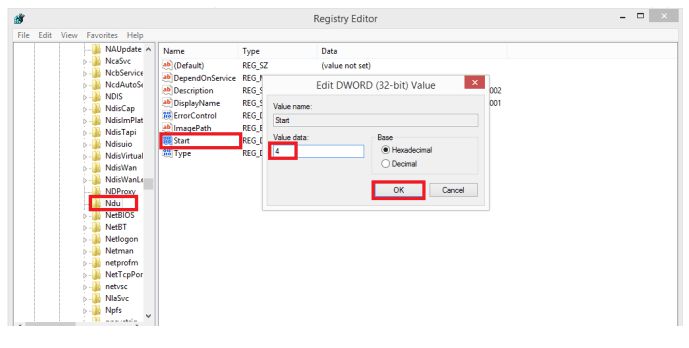
HKEY_LOCAL_MACHINE > SYSTEM > ControlSet001
- Now tap on the “Services” in the left pane and scroll down in the services and select “Ndu”.
- In the right pane, find and double-click on the registry value that is named as “Start” for modifying it.
- Change the value to “4” and doing this will disable it and will plug up the memory leak into the non-paged pool.
- Click on “OK” button and then close the Registry Editor which is as follows.
- Finally, restart your computer and see the Task Manager once the system reboots. You will be able to see that the System Host Local Service (Network Restricted) is not taking much amount of Disk or CPU as it uses to be before.
The other solutions that are out there to fix the issue are as follows and you can also try them if the problem still persists.
-
Troubleshoot Windows Update
If you are facing this problem in the Windows 10, you can fix the issue by following the below-given steps. Do follow the steps and fix the issue.
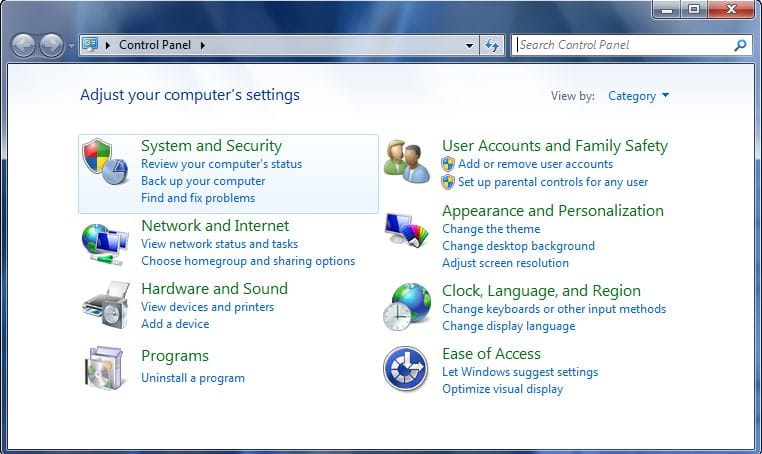
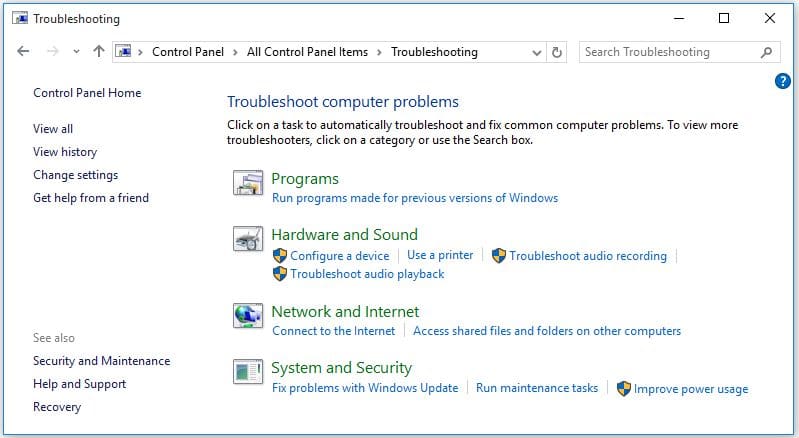
- Open the control panel from your computer.
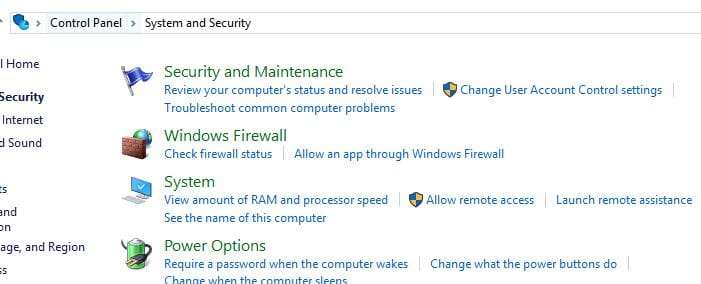
- Go to System and Security (set View by Category)
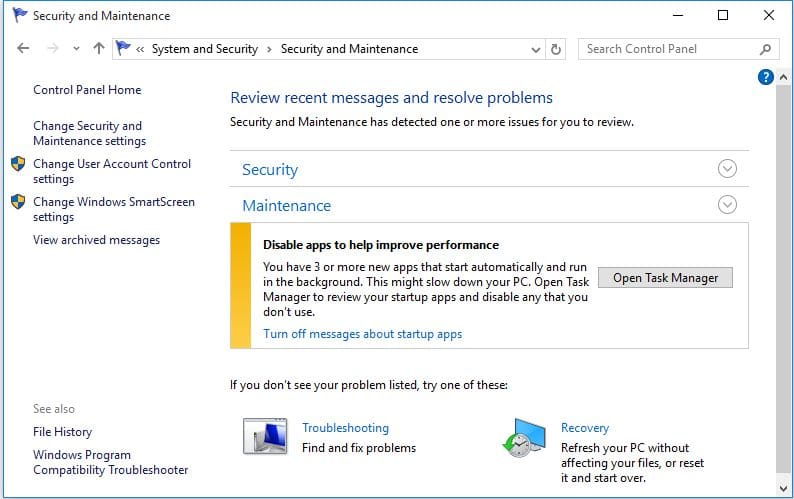
- Click on the “Security and Maintenance”.
- Now, tap on the “Troubleshooting” as shown in the below image.
- Now under the “System and Security” tap on “Fix problems with Windows Update”.
- Tap on “Next” button and then select “Try troubleshooting as an administrator” from the window that appears on the screen.
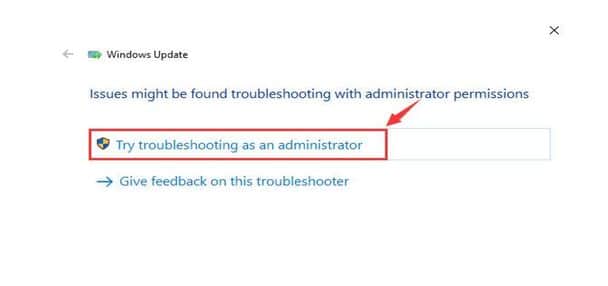
- Doing this should actually fix the issue, if not restart your PC and do the next solution.
-
Disable Few Services
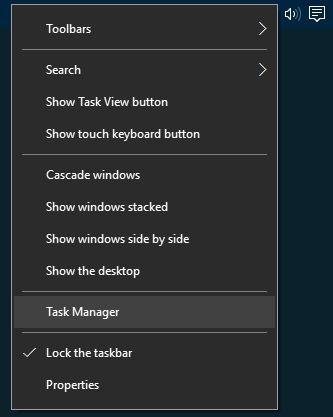
- At the bottom of the desktop, right click on the Task Bar and select “Task Manager” form it.
- Now in the Task Manager window, click on the arrow button near the “Service Host: Local System” category and this will show you which of the items are hogging the CPU usage clearly.
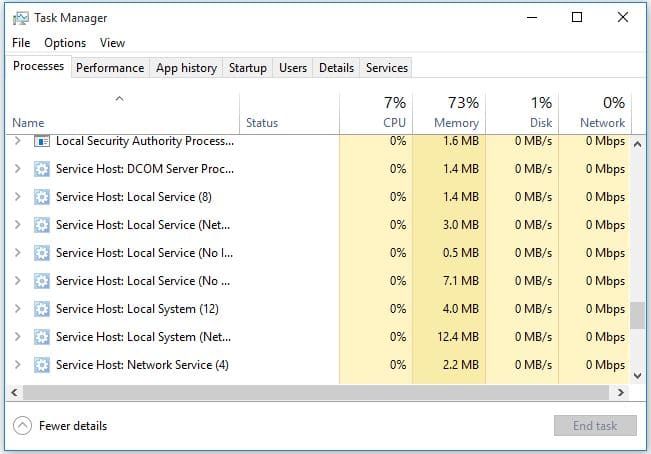
- Tap and select any one of the items under the category and then click on “End Task” button at the bottom of the window as shown in the image given below.
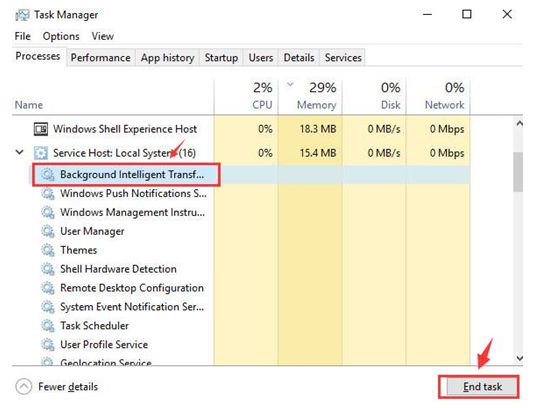
- Do the same for every item under the service Host: Local System category.
- Keep an eye on the CPU usage change and if you find the real culprit, do the following to disable those services.
- Right-click on the culprit that you have found and select “Open Services” from the list.
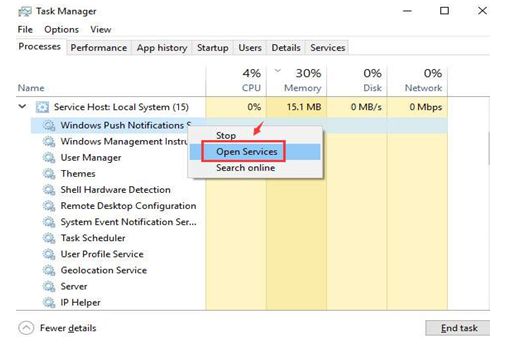
- Now find out the service having the same name as that in the Task Manager and right click on it and tap on “Stop”.
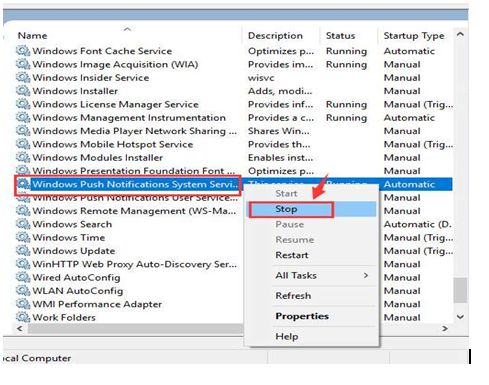
- If that works out and if the CPU usage is reduced, then this would be the real culprit which should be disabled in the following way.
- Double click on the real culprit and from the drop-down menu select and change the Startup type to be “Disabled”.
- Finally, tap on “Apply” and then “OK” button for saving the changes.

- Once the changes are affected, the problem will be resolved completely. If not go to the final solution and it can help sometimes.
-
Give a Try to SFC and DISM
If any of the above solutions do not work to decrease the CPU or disk usage, then consider doing the System file check. Even after doing this, it does not help you to solve the issue run DISM. Any of this can help you.
Users can also run the PC scan repair tool to find out the issues in the windows that raising the issue and get the problem repair solved.All these are the possible solutions to fix the issues with the error “Service Host Local Service High Disk or High Memory” usage. Now service host local system high mcpu concept is cleared.
svchost.exe service host: local system (network restricted)
This error mostly showing when we use very high CPU Resources, We can fix it by following some below topics.
- Perform Clean Boot
- Disable Superfetch
- End HP Processes
- End SCVhost Process
- Run SFC And DISM Scan
- Troubleshoot Windows Update
- Restart Windows Update Service
- Fix The Memory Leak Using Registry Editor
Verdict
So, we recommend the users to do follow any of these solutions to get the problem solved in just a few minutes. Hope, these solutions will help out.
This is same like svchost.exe service host: local system (network restricted), If you have any suggestions regards service host local system network restricted tutorial then kindly suggest us.
Page fault in nonpaged area windows 10
WMI Provider Host High CPU Windows 10
CPU Priority to prefer foreground apps


Hi blogger i see you don’t monetize your page.
You can earn extra $$$ easily, search on youtube for: how to
earn selling articles
Hello,
I need a guest post on this site: https://www.hindigagan.com/ what is your post price.
let me know,
waiting for your reply
Thanks.