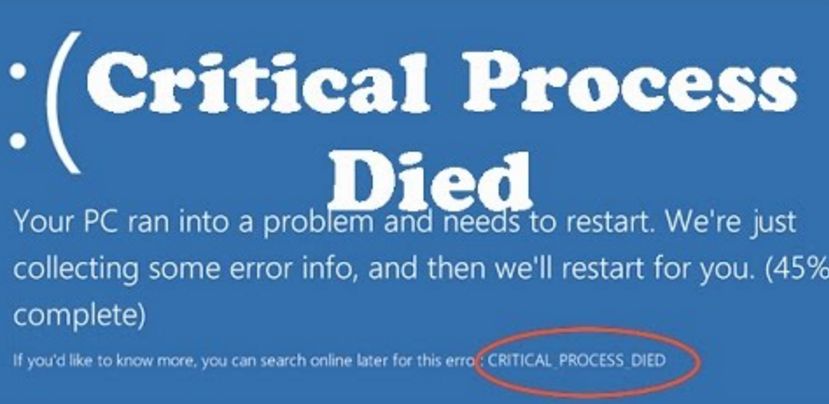
Critical Process Died Windows 10 means that a critical system process has died with blue screen error or else with error code bug check 0x000000EF. With this, there can be many problems in the OS of your system.
Your system will crash and show up this error on your Windows 10 PC. So, now a question would arise in your mind that why this error occurs and are there any solutions to fix the error.
For all your doubts, you can go through this detailed post and you can get answers/solutions for your problem in Windows 10 PC. Let us now know the actual causes of the “Critical process died”.
This error is mainly raised when the vital component of the OS detects that the data of it has been changed which should not have happened. This can be because of error in the memory or else with the bad driver etc. Lets know How do I fix Windows 10 critical process died? complete answer.
Contents
Best Fixes for Critical Process Died Windows 10 Error
What does critical process died mean on my computer? This error is also occurred during new windows installation or after the system upgradation. There are also many other reasons for this error such as due to issues with RAM, compatibility problems, due to virus attack and a disk having the bad sectors etc.
Now that you are aware of what actually is the error and causes of the error, you should now know about some best solutions for fixing that error. We can help you with some fixes to get rid of the error from Windows 10 computer. Go through the following to know more.
-
Run System File Checker Scanner:
SFC scanner is one of the most common solutions for all the problems related to Windows 10. In this case, SFC scanner helps to repair all the corrupted and changed system files which actually cause the problem. So, run the SFC scanner with the help of below-given steps and see that the problem was solved.
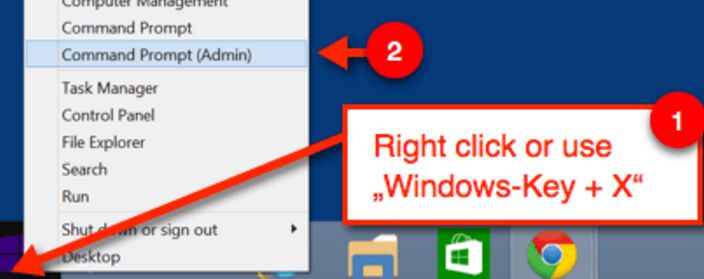
- Open the command prompt (Admin) from the Start Menu or through the shortcut buttons Windows + R or else by searching for the same from the search bar.
- Enter the command sfc/scannow in the command prompt and click on Enter button.
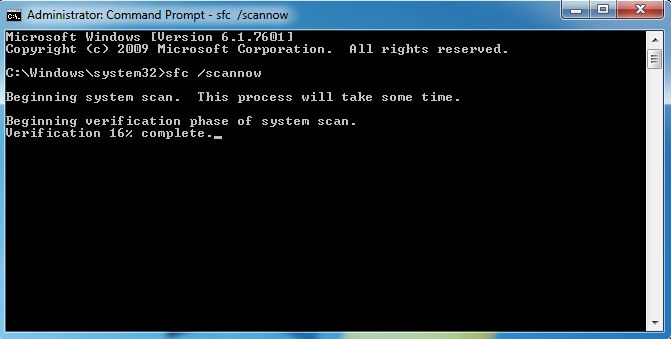
- You have to wait till the command executes properly or till the process completes. It may take at least 2 minutes to finish.
- Once the process is completed, you can restart your Windows 10 PC and see that you are not getting the error. If not proceed to next solution.
Note: If you are not able to boot to the desktop of the PC, you can run the System File Checker in the offline or safe mode.
-
Uninstall the Latest Updates from PC:
Some of the Windows 10 users have reported that after installing the latest update of Windows 10, the problem has actually raised. This can be a serious problem.
Microsoft released the latest updates for Windows 10 always and some of them are required to the system for working normally. But if the update actually causes such types of problems, you just need to delete those updates or hide them or uninstall them which will solve the problem.
In case the Critical Process Died error, you should consider uninstalling the latest windows update and bring back your OS to the previous stage or bring back to the earlier build. You can do this in the following way.
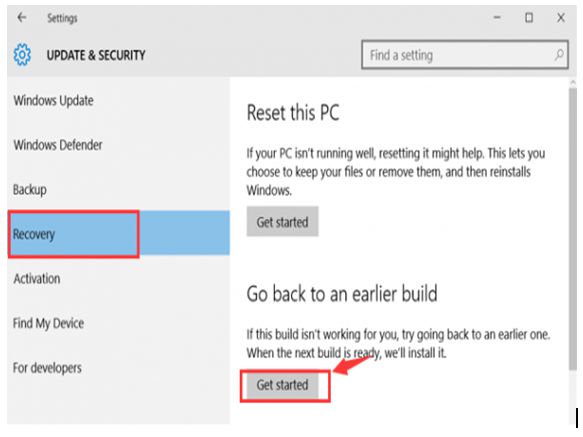
- Go to Start Button and from their open the Settings followed by Update & Security of the Windows 10 PC.
- From the left pane of the window that appears on screen, select “Recovery”.
- Again from the right pane, under the “Go back to an earlier build” option select “Get Started” which actually uninstalls the latest updates of your Windows 10 and brings back your OS to the previous version.
This is one of the best solutions/fixes for the error. With this, you would definitely see the result. Also, go through other fixes given below.
-
Run Antivirus Scanning:
A malware / malicious software can cause significant damage by changing the system files. Though they are not that dangerous, they can still raise the problems and errors like this. Before the problem becomes critical, you can just try this fix also to get rid of the problem.
If running the SFC scanner does not help you, you can give a try to running antivirus program for scanning your PC completely for all the virus and malware present. Run a trusted and reputed antivirus program to get rid of the issue.
If you find any such suspicious programs or the virus, you can uninstall them or remove them completely. This would solve the issue from a computer.
This is a very easy method and you do not necessarily do any extra work for this. Just open up the Antivirus software and tap on complete system scan. That’s it rest of the work is done by it showing up the final results. You just have to follow onscreen instructions to remove/uninstall the virus or software programs causing the issue.
-
Run DISM:
In order to repair the corrupted system image, you need to run DISM. It stands for Deployment Image Servicing and Management. This is a command line utility that you can run to solve the issue if SFC scanner and running antivirus program does not help you. Run DISM in the following way and you can see the result.
- Open the Command Prompt as administrator from the Start menu of your PC and right click on it to select and run CMD as Administrator.

- Once the command prompt opens, you need to type all the below-given commands one after the other correctly by clicking on the Enter button after each command.
- Dism /Online /Cleanup-Image /CheckHealth
- Dism /Online /Cleanup-Image /ScanHealth
- Dism /Online /Cleanup-Image /RestoreHealth
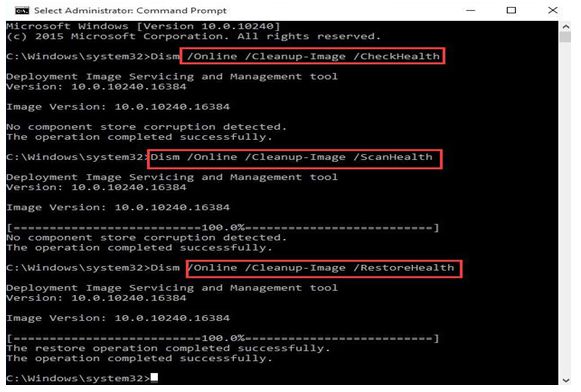
- Once all the commands are executed successfully and the checking is over, you can restart your computer.
-
Download and Update the Latest Drivers:
Drivers that are using the memory in a wrong way or else the bad drivers is also the reason for the error Critical Process Died in the Windows 10 OS as said above.
In order to get rid of this error occurring again from the bad drivers, you have to open the device manager and see that if any of the device drivers to be updated. Make sure that all the device drivers are updated till dates such as sound card drivers or graphics card etc. and that they are compatible with Windows 10.
If not, you need to update them manually to prevent the issue from happening again. If it is annoying to update all the drivers manually, you can update them automatically.
In order to update the drivers automatically, you need to download any of the best driver updater tools such as Driver Easy or similar tools which are safe to use. This type of software helps to detect as well as download and update all the necessary updates for the drivers automatically.
But all that you need to do when using Driver easy is, you need to tap on “Scan Now” button for allowing it to scan all the needed drivers and also click on the “Update” button to update all those device drivers to be installed/updated. If you want the process to be done in just a few seconds, it is recommended to use the professional driver downloader and installer which can complete your work in just a few seconds.
-
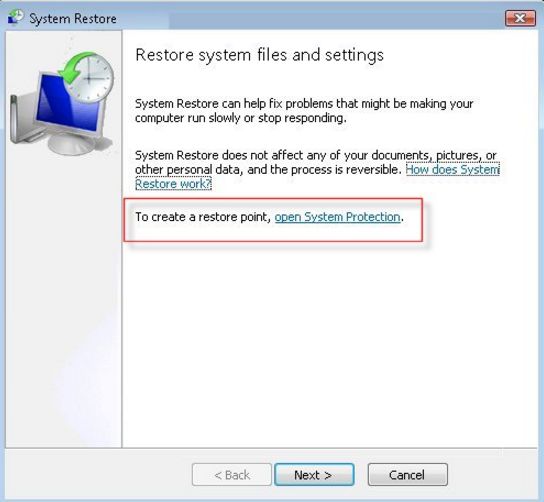
Do System Restore:
If the problem was caused in the recent times, it is better to do a system restore which can restore your computer to a good point which can help you get rid of the error. If the error occurred after the system or OS update, you have to stop the update from being installed on your PC and you should report that issue to the Microsoft support who can help you with solving the issue.
-
Do a Clean Boot:
Starting your computer in a clean boot mode it will start by selecting a minimum set of drivers by default as well as the startup programs. Clean booting has been designed for isolating the problems with the performance if any.
-
Disable Sleep and Hibernate Modes:
Disabling Sleep and Hibernate from the settings of the power could sometimes help you. You can disable it from the settings available in the Control Panel.
- Go to the Control Panel followed by the options All Control Panel Items then Power Options and finally click on Edit Plan Settings.
- You can follow this process for disabling the Hibernate mode if only you have enabled it previously and see that the problem is solved.
o if evething is ok then enjoy movies and read post on Is Yesmovies legal? for enjoy Sunday.

These are the few troubleshooting methods that can help you resolve the issues that are coming with the error as well as to get rid of the error code Critical Process Died in windows 10. Any of these easy methods could absolutely help you and so if you are facing the same issue, give a try to any of them and see the result.