
Minecraft has gained much popularity with its unique style of play. It is played by legions of gamers across the globe. It is a simple and easy game that can be played by the single user. Due to the rise in popularity of Minecraft game, most of the gamers search for a multiplayer mode of the game, which in reality is not possible without a server.
If you are searching How To Make A Minecraft Server then it will help you sure. The multiplayer mode of Minecraft only runs with the help of a server. The system on which the game is being played should be connected to the server in order to play in multiplayer mode.
The single-player mode is the most precious part of the game that all the game lovers’ love about Minecraft. The game has a simple UI and even new gamers can easily adapt the game play of Minecraft game.
As we mentioned earlier, due to the rise in popularity and increase in the user base of the game, the quest of the multiplayer game is getting intense day-by-day. In order to play Minecraft game on multiplayer mode, there comes a need for a server that connects multiple players. The user can either have his/her own server or can use other means to get the services of the server.
Contents
How to make a Minecraft server?
If you have any such dreams or plans to start your own Minecraft server then you are at the right place. Today, we have brought before you the simple guide that will teach you about how to make your own Minecraft server. Though it is not an easy process, it is not a tough process as well.
Before taking a dedicated dip into establishing multiplayer mode in Minecraft game, the user must make sure that the server is of the high security level that provides good speed and all necessary stuff.
Check out your hardware first
To start with, make sure you have hardware as per the requirements so that it can run a multiplayer game. The hardware of your computer should provide compatibility to the multiplayer gaming.
There is no need to use a high-end computer to get the work done, instead just use a normal computer with minimum hardware requirements. Notebooks won’t come for work for this game. First and foremost, you must have good RAM. You must have at least 1 GB of RAM. This RAM size will allow around four to five players to play at a time.
Other than RAM, you should have an excellent internet connection.
- The game play literally depends on the speed at which your internet runs.
- To check if the hardware requirements of your computer satisfy the needs of the Minecraft game, go to CanIHostaMinecraftServer.com and input the size of RAM and the internet speed in the specified slots.
- The website will show you how many players are allowed to play the game at such requirements.
- For instance, if you have 4GB of RAM and your internet speed is 100 Mbps, around 48 people could play at a time on the Minecraft server.
Install and setup the Minecraft server
If you are done with checking the hardware requirements of your computer, you can now set up your own and dedicated Minecraft server. We have mentioned below the process to install and setup Minecraft server on Windows and Mac computers.
Windows Installation Process
The installation process for Windows is so simple as shown below.
Step 1: Update Java
You have to update the latest version of Java into your computer.
Step 2: Download the Server
After you are done with installing the latest version of Java, go to the download page of Minecraft and download the .jar file present in the ‘Multiplayer Server’ section. For that, create a folder on your PC to store all the server files.
Step 3: Install the Server
Now, double-click on the downloaded file which creates the required files that will open the server. You need to accept the user agreement to run the server properly.
To do so, you need to find a .txt file with the name eula.txt and open the file and change ‘eula=false’ to ‘eula=true’ and save it. If you want your Minecraft server to be more personal and customized then you can do so by going to ‘Configuring from the command line’.
Mac OS Installation Process
Compared to installing Minecraft server on Windows, installing it on Mac OS is a bit difficult.
Step 1: Download the Server
Download the latest version of the server from the official page.
Step 2: Install and Update Java
As most of the computers come pre-installed with Java, your computer most probably would have Java installed. If it is not installed, then download the latest version of Java.
Step 3: Setup the Server
1. Before you setup, the server, ensure that you have created a dedicated folder to store the files related to the server i.e., minecraft_server.jar’. Open TextEdit and paste the code mentioned below:
#!/bin/bash
cd “$(dirname “$0″)”
exec java -Xms1G -Xmx1G -jar minecraft_server.jar nogui2
2. Save the file with filename ‘start.command’ and store it in the same folder as that of the server.
3. Now, change the file permissions and to do this open Terminal, and enter chmod a+x. Drag ‘start.command file into the terminal window and press enter.
4. Same like Windows, double-click on the ‘start.command’ file.
If you want more customization to the sever, then go to server.properties file.
Invite your friends for multiplayer game of Minecraft
When you are done with the above process of installing your own server, you can now take a further big step towards the Minecraft game. You can now invite your friends are whoever you want to play with in Multiplayer mode.
You are now done installation of the server and you have to proceed to connecting step. There are again three different ways to connect to the server.
1. Same Machine, Same Server
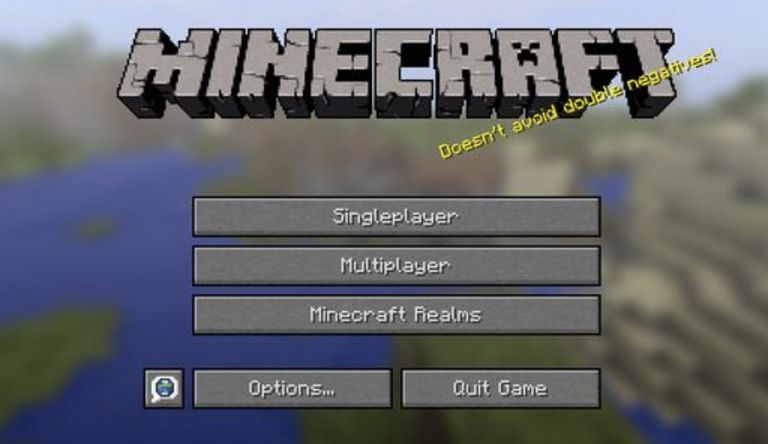
If the computer you are playing the game on has a server, then simply choose ‘Multiplayer’ option on the screen and type ‘localhost’ in place of IP address.
2. Connect through same network
If the friends you have invited to play the game are use the same internet connection, you can connect through your internet IP address. To do so, type ‘ifconfig’ in the cmd prompt and find the address near ipv4.
3. Connect Outside Your Network
If the friends you have invited to play the game are out of your LAN, then the IP address of your server is needed in order to connect to the game. Also, you are required to port forward port 25565 to the IP address of your server so that the server can be accessed by your friends using another network.
If you have this dream of starting a Minecraft server on your own, before getting started any further, it is important to know the hardware requirements. The hardware requirements play a vital role in the multiplayer game of Minecraft game.
Also, you need to check server setup, maintenance, security, upgrades etc. If you are wondering how long it will take for you to set up the Minecraft server, we take no more than an hour overall to set it up. By setting up a server for Minecraft, users can customize the game.
Are Minecraft servers free?
There are paid and free both, free version giving limited facilities for user and paid as we can enjoy more facilities.
Conclusion
The customization can be done to an extent that the single-player game can turn into Multiplayer game, and this is all thanks to the separate server used.
You can let your friends and dear ones join this popular and fun game by including an own Minecraft server. Though the process seems simple and bug-free, it is not.
You may end up getting bugs while executing the process, nevertheless by following the steps we have mentioned above without any mistakes, you can enable the multiplayer play of most popular Minecraft game on your own server with those selected people you have invited. Hope this How To Make A Minecraft Server tutorial will hep you.


Why users still use to read news papers when in this technological world the whole thing is
accessible on net?