Most are using their laptops daily but most people don’t know about How to Take Screenshot in Laptop. While browsing the web, people find some interesting things on it. If you want to show that interesting stuff to your friends, you have to capture the picture.
On smartphones, it is pretty much simple to take the screenshot using some keys. How about PC or Laptop? Is there any possibility to take a screenshot in laptop or PC? The answer is yes. We have a simple way to take a screenshot or capture the screen on your PC or Laptop with much ease.
There is the best way to take a screenshot in a simple way. If you are a Windows device user, you can quickly capture the snapshot without any jeopardy. The users need not have to make use of some other external software programs to take the screenshot.
In order to send some image through email to your friend, provide tech support to the user and other uses, you can follow this simple guide. In this post, we have come up with a simple procedure that aids the folks to capture the screen using simple methods.
We have provided a list of 5 different on methods how to take a screenshot on windows 10 or PC without any hassle. Have a look!

Contents
- How to Take Screenshot in Laptop, Windows 10 and PC
- Method 1: Default Keyboard Shortcuts
- Method 2: Take Screenshot using Snipping Tool
- Method 3: Capture Screenshot using PicPick Tool
- How to Download & Use PicPick Tool to Capture Screen?
- Method 4: Capture Screen on Windows 10 Device using OneDrive
- Method 5: Take a Screenshot using Screenshot Captor Tool
- Conclusion
How to Take Screenshot in Laptop, Windows 10 and PC
In this guide, we have included 5 different methods that assist the users to capture the screen of Windows 10 and other versions of OS on your PC or Laptop, Computer without spending any money. I mean there are five different ways for windows 10 screenshot. Check it out!
Method 1: Default Keyboard Shortcuts
The users can easily take a screenshot on their Windows PC or Laptop. Irrespective of the version that you use on your Windows device, you can easily capture the screen.
You need to make sure that you have complete access to different picture editing software programs. In this method, you can make use of some default keyboard shortcuts to take a screenshot. Just follow the below steps to capture the screenshot on Windows PC and Laptop with much ease. Check it out!
Step 1: First of all, you need to check out the location where you want to capture the screen on your device.
Step 2: On your Windows Laptop or PC, you can see a key on the keyboard that says ‘PrtScn’ key.
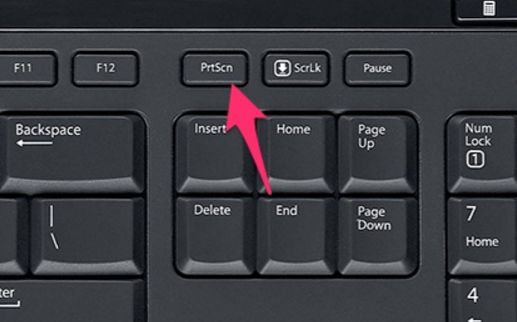
Step 3: You can see this key on the upper-right corner of your keyboard.
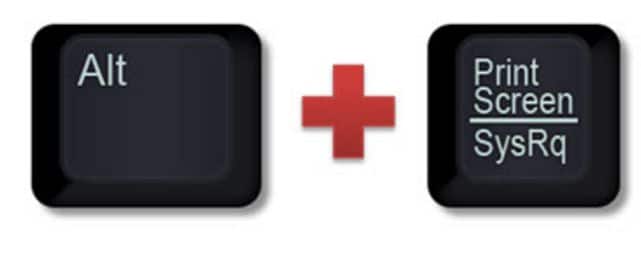
Step 4: In order to capture the screen on your PC or Laptop, you need to press Alt + Print Screen.
Step 5: The active screen on your device will capture.
Step 6: If in case, you are using a Laptop, you need to use FN + Print Screen keys.
Step 7: You will not get any kind of indication after capturing the screenshot.

Step 8: But, there is a possibility of saving the image or screenshot on your device. In order to save the screenshot, you need to press Windows Key + PrtScn.
Step 9: You can then save it to a particular folder on your device.
Step 10: Another method is to open Paint on your device. You can then paste the picture that you have captured on your PC. Go to File and save the picture.
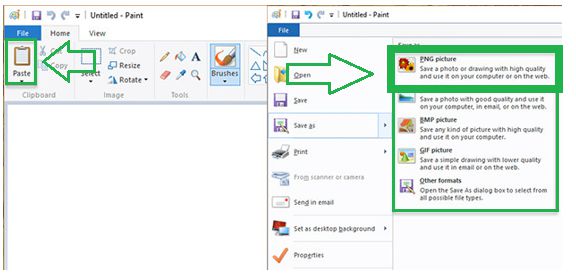
Step 11: You can save the screenshot in any of your desired formats like PNG, JPG, BMP GIF, etc.
Method 2: Take Screenshot using Snipping Tool
One of the best inbuilt screen capture utility available on your Windows device is using the snipping tool. You can even edit your screenshot of your screen using the snipping tool on your Windows device. Follow the simple steps to take a screenshot on your device using the snipping tool.
Step 1: First of all, go to Start menu on your Windows device.
Step 2: If you are using windows 8 device operating system, you can enter snipping tool in the search button.
Step 3: The icon of snipping tool comprises of a pair of scissors.
Step 4: After selecting the snipping tool, you will get a window comprising of ‘New’, ‘Cancel’ and ‘Options’.
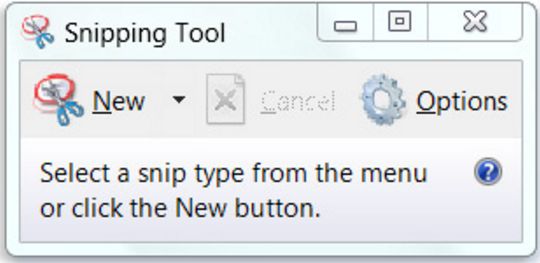
Step 5: The user needs to select the type of snip from the drop-down menu on ‘New’ button.
Step 6: Just click on the menu and you can find a list of options like a free-form snip, rectangular snip, window snip, and full-screen snip.
Step 7: By clicking the new button, you will get a plus symbol.
Step 8: Now, you can choose your preferred area on the screen so as to snip it.
Step 9: The screen that you have captured will appear in a new window wherein you can make some changes to it.
Step 10: The users can save this image as PNG, GIF, JPEG or HTML file format.
Method 3: Capture Screenshot using PicPick Tool
On the web, we have copious screenshot utilities available for all the peeps. You can find both free and premium screenshot tools and utility programs available on the web market. The users can choose the best program based on their utility. Some of the tools provide some customization options for the users.
PicPick is one of the best editing tools available on the web for all the users. This tool helps the users to make some changes to the screenshot with much ease. The users can make use of this PicPick tool absolutely for free of cost on Windows.
How to Download & Use PicPick Tool to Capture Screen?
Here are the simple steps that help the users to download and install PicPick tool on your Windows PC or Laptop:
- First of all, download PicPick app from the web.
- You can purchase this tool or simply go for the free download.
- Just follow the on-screen steps so as to complete the installation process.
- Once the app installs on your device, you will get a shortcut icon on your desktop.
- Open the PicPick app on your Windows device.
- You need to select the type from the list present in the section of Screen Capture that appeared in the bottom left corner of the window.
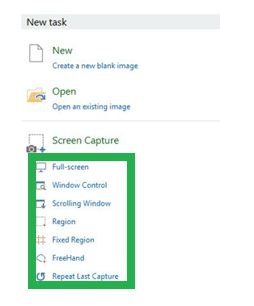
- Just like the snipping tool, you can see a list of options for your screen capture.
- After capturing the screen, there is a possibility of saving the screenshot of your captured image.
- You can save this screenshot in any of the file formats like PNG, BMP, JPG, GIF, etc.
This is the simple procedure that helps the users to capture the screen or take a screenshot using PicPick took on your Windows PC or Laptop.
Method 4: Capture Screen on Windows 10 Device using OneDrive
If you are using Windows 10 operating system, you will have a default option of storing all your screenshots in OneDrive. OneDrive is one of the most popular cloud file storage service available for all the users on the web.
Whenever you open this storage service, it will ask the users whether to save all your screenshots to your cloud storage or not. You can see it whenever you capture a screenshot using Print Screen key using your keyboard.
Just follow the steps to save your screenshots to your OneDrive cloud storage service.
- First of all, you need to open OneDrive on your Windows 10 device.
- You need to click on the print screen key on your keyboard so as to capture the screen.
- Immediately, OneDrive will show a prompt message asking you whether you wish to save the screenshot to OneDrive or not.
- If you want to do it, then just confirm to store the screenshot.
- The screenshot in the format of PNG file format will save to the OneDrive cloud storage every time when you capture the screenshot.
- You will not get any kind of indication that the screen capture.
- However, the photos of all your screenshots will save automatically to OneNote.
- You can check the box of ‘Automatically save screenshots I capture to OneDrive’.

- You can then check out all your screenshots present in OneDrive folder on your Windows 10 device.
Method 5: Take a Screenshot using Screenshot Captor Tool
Screenshot Captor is another best tool that helps the users to capture the screen with much ease. You need to sign up for a free account on this website so as to use this tool. You need to register on this website by providing essential information in the provided fields.
After confirming your account, you can then use Screenshot Captor on your Windows device. Using this tool, you can easily capture the screen of your device and save it to your desired folder.
In this tool, you can find a checkbox that says ‘Autofit’. Just by checking this box, your screenshot will automatically fit the size of your window.
Conclusion
This is all you need to know about the process of taking a screenshot on your Windows PC and Laptop using 5 different methods.
Hope this guide aids you in the best way to understand different ways to capture the screen on your Windows device regardless of the version of operating system. Hope now how to screenshot on windows 10 is fully cleared.