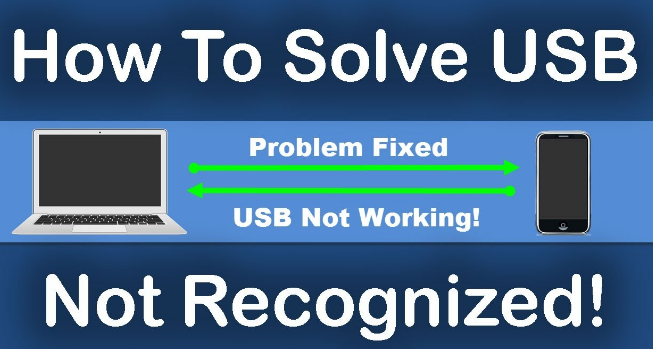
Do you have an error message Ethernet doesn’t have a valid ip configuration windows 10 while surfing the internet or when playing some online games?? And you can’t connect to the internet back which shows the yellow triangle next to your internet connection?? Then, it can be dues to various reasons.
It can be a configuration error that occurs in between the DHCP server and your Windows. The error can arise when DHCP can’t get the valid IP address from Network Interface Card (NIC) i.e., when the NIC is hooked up to only the modem or router through the Ethernet cable.
This requires your PC to speak to your router and the internet should function. There are many reasons for the problem to occur and they include, a defective router, NIC would be faulty and the IP address that is assigned to your computer would be incorrect.
Contents
Easy Fixes to Solve the Error “Ethernet Doesn’t Have a Valid IP Configuration”
As the dynamic IP address is permitted by default, the users don’t have to enter any of the settings manually for connecting to the internet network with the DHCP server. But, as your Ethernet do not have it, you will not be able to connect to the internet and will also get an error “No internet access” or “Limited connectivity”.
These below shared are all the best and easy methods to solve the issue with the Ethernet having the invalid IP configuration. All these are the straight forward methods which the users themselves can do them manually without the help of any expert or any hardware support.
This problem can be solved with the help of below given methods which you should follow to solve the issue. Before you proceed to follow any of the methods given here, you just have to do some simple fixes which can sometimes solve the issue without having to do lengthy fixes.
- Restart Your Computer and Check if the Ethernet has a valid IP configuration. If not, do the next on.
- Turn off your router/modem. Leave it for at least 30 seconds or 5 minutes and turn it ON back and retest. If the issue is not solved.
- If still there is a problem, you need to try connecting your PC to another router. If the issue repeats even with the other router, change the network card and even if the network does not connect replace the router. Do a factory reset before replacing. You have to do this process by following the factory reset instructions given in the manufacturers manual. or
- If you are using a Wi-Fi, you can switch it off and connect your PC using a cable and check it the issue is solved.
-
Disable the Fast Startup and Restart your PC:
Fast Startup is mainly designed for loading the settings from the memory of the system or else from the cache in order to reduce the startup and reboot time. Lots of users have said that the error is fixed when the Fast Startup is disabled on their PC and their system is restarted. So, let us get into the fix.
- Open the “Winx Menu” and for this, you need to right-click on the “Start Menu”.
- From the Winx Menu, tap on the “Power Options”.
- In the left pane, the user has to select “Choose what the power button does” / “Choose what the power buttons do”.
- Now, tap on the option “Change settings that are currently unavailable”.
- Next, uncheck the box present side-by to the option “Turn on fast startup (recommended)” which is located at the bottom of the windows and this will disable the “Fast Startup”.
- Tap on the “Save changes” button and close the settings of the system.
- Restart your PC to make the changes affected.
This fix should usually solve the problem many times. If not, please refer the below methods to sort out the issue.
-
Reinstall TCP / IP Settings:
With the help of simple steps given here, users can easily reinstall the TCP / IP settings.
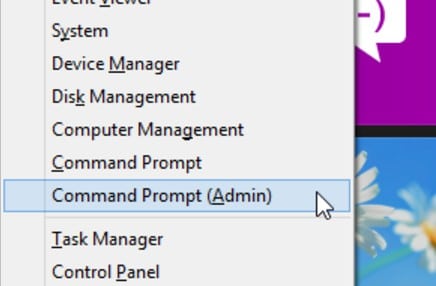
- Open the Command Prompt as Administrator from your Windows from the Windows key or start menu.
- Enter the commands “netsh winsock reset” followed by “nets in tip reset”.
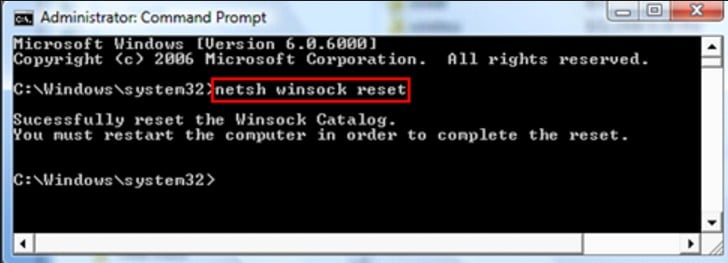
- Finally, restart your computer and this will make the changes in the TCP / IP settings.
-
Disable and Enable Network Interface Card:
Usually, the router gives the IP address automatically and it is preferred until the user specifies the IP address manually. The user should by default set it to automatic and connect the internet.
Once the internet is connected, see the properties whether the settings are correct and you can reconfigure it. The user can follow the below given instructions to do this.
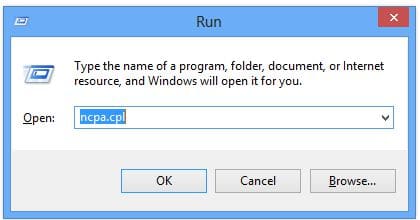
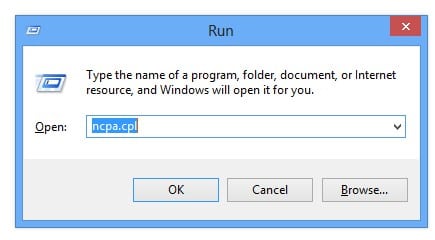
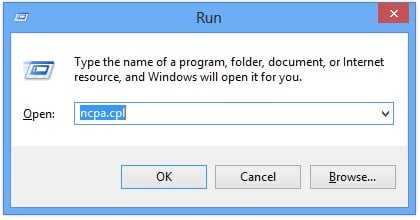
- Click on Windows button + R and this will open the Run box.
- Enter the command “ncpa.cpl” in the Run box and click on “OK” button.
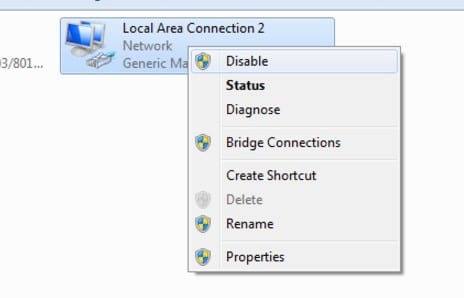
- Now, in network connections window and again right click on the NIC which you have the issue and tap on “Disable” option from the menu.
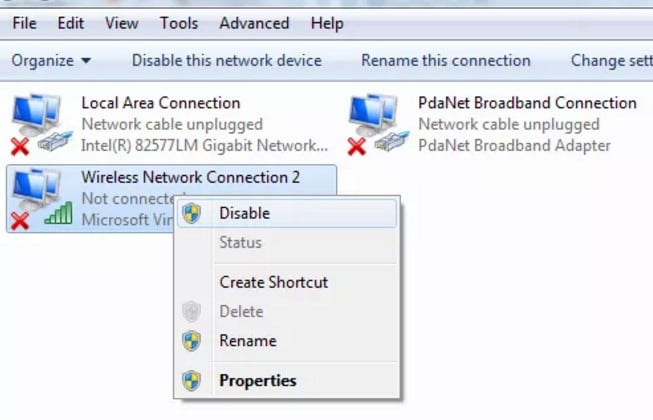
- After few minutes, you can “Enable” the NIC by again right clicking on the NIC and selecting the Enable option.
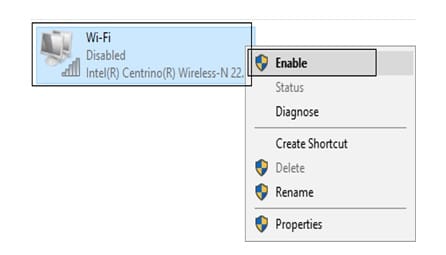
- Wait some time i.e., till the NIC receives the IP address successfully.
- If the issue still arises, then enter the below-given commands one by one.
- ipconfig / release
- ipconfig / flushdns
- ipconfig / renew
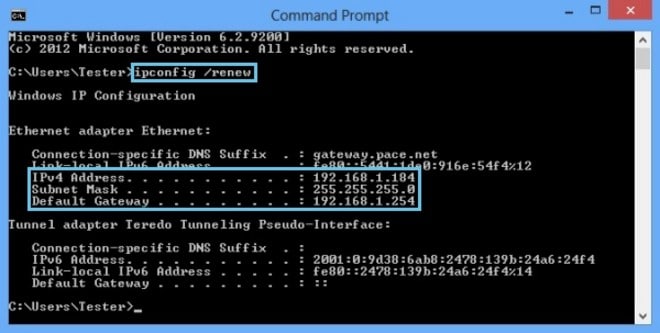
- Finally, restart the computer and check if the issue is resolved successfully. If again the problem persists, you can do the other methods too.
-
Check and Change NIC Settings:
- Press the buttons Windows along with R.
- Enter the command “ncpa.cpl” in Run and tap Enter button.
- Next, the user has to right click on the NIC which has the problem and select the properties.
- From the Ethernet properties windows that appear on the screen, select “Internet Protocol Version 4 (TCP/IPv4)” and click on “Properties” which will open the properties of it.
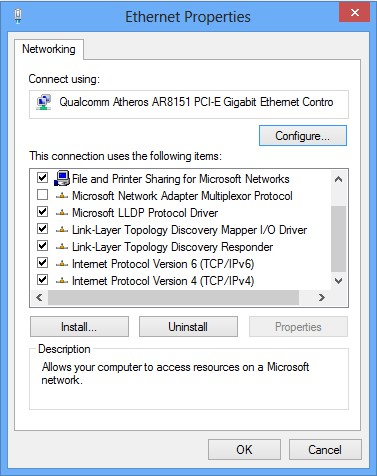
- From the properties, you need to check and ensure that the options “Obtain an IP Address Automatically” and “Obtain DNS Server Address Automatically” is selected and click on “OK” to exit from the properties.
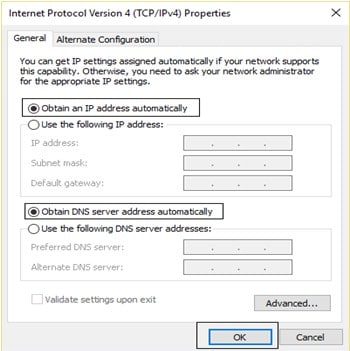
- Restart your computer to see the changes.
-
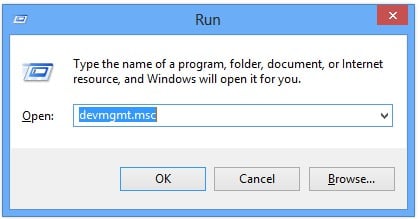
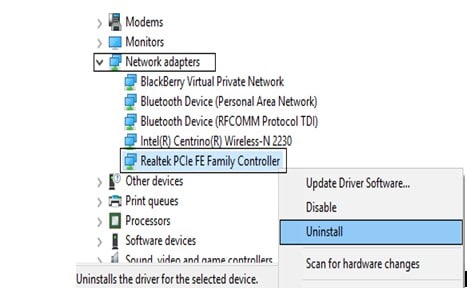
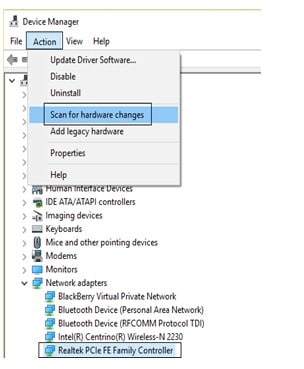
Uninstall and Reinstall the Ethernet Drivers
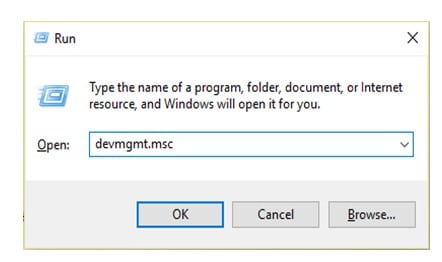
- Click Windows + R buttons.
- Type the command “devmgmt.msc” and this will open the Device Manager.
- From the device manager, you have to expand the option “Network adapter” and right click on the network adapter for which you are having the problem and tap on uninstall button from the menu.
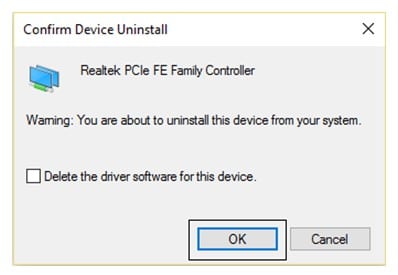
- If a pop-up appears to confirm the un-installation, you have to click on “OK” button.
- Finally, the user has to tap on “Action” button and then tap on the option “Scan for hardware changes” from the drop-down menu.
- Shutdown your computer and Switch On it back to see the changes.
-
Update the Drivers:
- Click Windows key along with the R button.
- Type “devmgmt.msc” which will open the device manager.
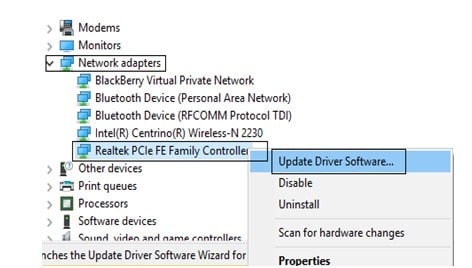
- From the window Device manager, expand the option “Network Adapter”.
- Right-click on the “Network Adapter” from which you are facing the problem and tap on the option “Update Driver Software” from the drop-down menu.
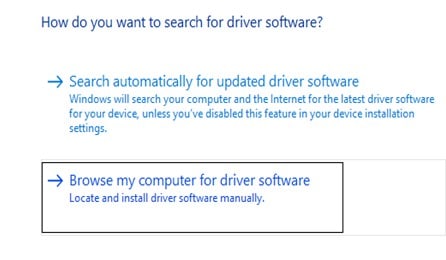
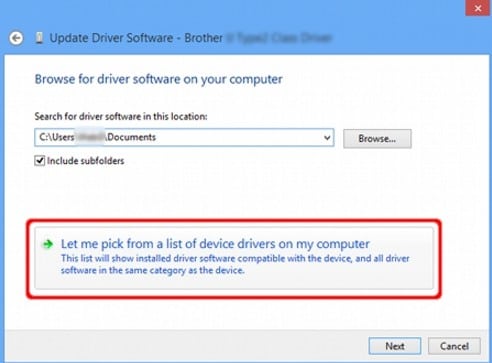
- Now choose the option “Browse my computer for driver software” from the window that appears.
- Tap on the option “Let me pick from a list of device drivers on my computer” and click on “Next” button.
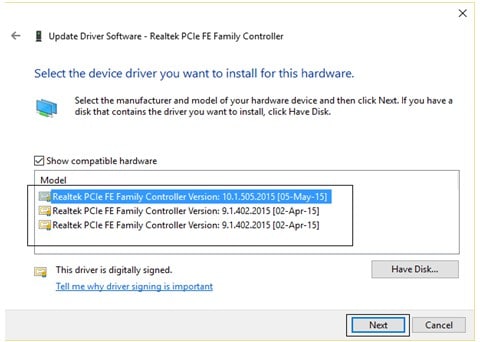
- Finally, the user has to update all the drivers’ one after the other as shown in the picture below by clicking “Next” button.
- If the above process does not work out, the user can download the latest drivers from the manufacturer’s website and install them to update the drivers.
- Reboot your computer finally and the changes will be made.
Conclusion :
Any of these associated methods could help resolve the problem and help you connect back to your network or internet connection. So, users can just follow the processes as given here and they can definitely observe the change.
If there are any other methods, we would try adding them here for your reference. This is how the users can successfully fix the error “Ethernet Doesn’t Have a Valid IP Configuration”.
If this problem is solved and users see an another error Limited connectivity or no internet access, then users have to do some more fixes such as running the troubleshooter, changing the Bitdefender firewall settings or else the antivirus firewall, resenting the TCP / IP auto-tuning, using the Google DNS and by waking up the wifi adapter etc.
Any of these ways could solve the limited internet connectivity or else the no internet access problems. We would try discussing this issue clearly in the next post. Hope, this post would help you solve the error in just few minutes and in the easy way.